Microsoft Project
Overview
Time Location Plus is capable of importing data from Microsoft Project version 2000 and later.
In order to import data from Microsoft Project it is necessary to allocate chainages to the Microsoft Project tasks and to set up an outline code base for the different types of tasks. When importing Microsoft Project must be open with the relevant project active.
Allocating Chainages
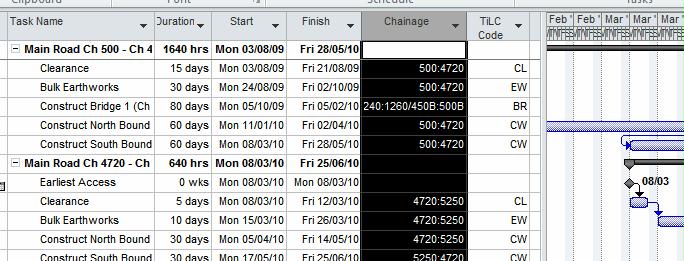
Chainages are allocated in a Task Text Field in the format
Start Chainage : Finish Chainage
Any Task Text Field can be used but it must be the same field for all activities and it must not be used for any other purpose.
In the above example the Text2 Field renamed to Chainage is being used with the task Clearance starting at chainage 500 and finishing at 4720. If the entry had been 4720:500 the activity would have been starting at chainage 4720 and finishing at chainage 500. If an alternate chainage is also required this can be specified by separating the two chainages with a slash e.g. 1230:420/23B:450B as shown with Construct Bridge 1.
Allocating Codes
A specific outline code (or series of codes) for use with Time Location Plus package must be set up, with values for the different types of Task. This will form the basis of the Key Legend for the time location chart. All tasks which are to be imported into the time location chart MUST be allocated a time location package code. Tasks which do not have an allocated code will not be imported.
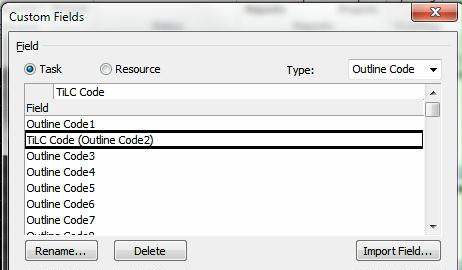
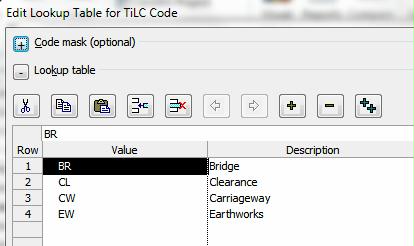
In the above example a Outline Code 2 has been set up with values for Bridge, Clearance, Carriageway etc.
When these codes have been allocated to the relevant Tasks the data is ready for importing into Time Location Plus.
Within Time Location Plus
From the main menu select Import - Microsoft Project

The MS Project Import Options window will open.
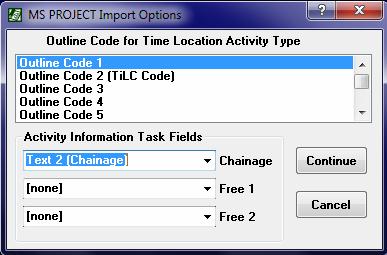
Highlight the Outline Code holding the information on the Time Location Types, and select the Task Field holding the chainage information. Optionally Information from other text fields can be imported into Free 1 or Free 2.
Press Continue.
The data will then be imported and the Save Microsoft Project Settings  button will appear in the toolbar.
Copyright © 1998 - 2014, Naylor Computing